Sales
| +91-8800766112
| +91-120-6619504
Support
| 0120-62-77777
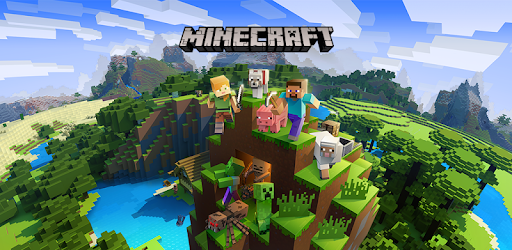
Creating a Minecraft Server: A Comprehensive Guide
Feb 17,2021
Contents of Table
- 1 Here’s How to Make Your Own Minecraft Server for free.
- 2 Minecraft Server Minimum Requirements
- 3 How to Create a Minecraft Server (JAVA) – Instructions for Installation
- 3.1 Step 1 – Download Java for Minecraft server on your Windows 10 PC
- 3.2 Step 2 – Download Minecraft server from Minecraft’s official website.
- 3.3 Step 3 – Locate the jar file you just downloaded
- 3.4 Step 5 – Double click Minecraft JAR file and run it.
- 3.5 Step 6 – Grant Firewall access to the JAR
- 3.6 Step 7 – Evaluate server performance
- 3.7 Step 8 – Initiate handshake with the server
- 3.8 How to create a Minecraft Server for friends?
- 4 How to setup a Minecraft Server with hosting provider
Posted by Nishant Nath
If you have ever played Minecraft, you might have thought of creating a server of your own. You can host the game on your local computer or pay a small fee and lease an entire dedicated server. From technical standpoint, the commands involved (in configuring a server) are not as easy as they first seem; even the most elite gamers often stumble upon them.
Here’s How to Make Your Own Minecraft Server for free.
If you have been playing Minecraft for a while, you probably know the importance of a private server by now.
Minecraft is a sandbox video game created by a developer named Markus Person and eventually bought by Microsoft. It allows players to build their own world using blocks of varied sizes.
| Released | 2011 |
| Developer | Markus Persson |
| Currently owned by | Microsoft (purchased 2014) |
When creating a Minecraft Server you have two choices –
- Setting up on a local computer
- Leasing a private game server against a small monthly fee
You can setup Minecraft server on a local computer, but it will not work half as fast as in a game server. Moreover, as your world gets more and more complex, you will have a difficult time running Minecraft from a local server.
This article will walk you through How to create a Minecraft Server. To begin with, we will start installing java for Minecraft Server on Windows 10.
Minecraft Server Minimum Requirements
A system with the following configuration (or higher) will run Minecraft the best.
| Platform | Private Server or Windows 10 |
| RAM | 4 GB Recommended |
| Internet Connection | Broadband recommended. 10 MBPS or faster |
| Bandwidth | Depends upon duration of usage. |
How to Create a Minecraft Server (JAVA) – Instructions for Installation
Step 1 – Download Java for Minecraft server on your Windows 10 PC
It is recommended you always download the latest version of Java to avoid conflicts and compatibility issues.
Download Java for Minecraft Server from here.
Step 2 – Download Minecraft server from Minecraft’s official website.
This will download the Minecraft Server Jar to your ‘downloads’ folder by default. While the steps may vary for different Jar versions, the approach is more or less the same with every Java release.
Step 3 – Locate the jar file you just downloaded
This should not take much time. It is recommended to move your files to more easily accessible folders like desktop.
Double click the JAR file, it should start parsing all the necessary files needed to start a server.
Step 4 – You need to agree to the Minecraft End User Licence Agreement and Set Server Properties.
We will start by tweaking some settings before the server can be started. You cannot agree to Minecraft EULA by clicking I accept.
Open the EULA text file and update the following –
Eula=false to eula=true
Save changes.
Now adjust the server properties. You can do so by running the server properties file.
Step 5 – Double click Minecraft JAR file and run it.
Step 6 – Grant Firewall access to the JAR
Step 7 – Evaluate server performance
A Minecraft server stats windows will appear now.
You are likely to get a message that the system cannot keep up with the processing. It is for this server a hosted server is recommended for a better performance.
Step 8 – Initiate handshake with the server
Having setup your server, you can now connect it to the Minecraft.
Now you need to run the game.
Multiplayer icon is what you should be looking for.
Step 9 – The next screen takes you to Add Server option.
We already have added some server before, but your list of servers is likely to be blank.
Your server address would be your IP. To know your what to enter in your IP, go to what is my IP, and the same will be displayed almost immediately.
Enter your IP address.
Note – your IP may not always remain the same. To allow your friends to connect to your server, you need to convey the updated IP every time your network address refreshes.
You can now start playing on your server.
Also Read: Games To Host On VPS Servers
How to create a Minecraft Server for friends?
Your friends cannot connect to your server unless you setup Port Forwarding. Remember your PC is being used a server and you need to open it to internet access. Your friends cannot discover your server until port forwarding has been enabled.
Opening firewall ports
Open control panel, system and security and windows firewall.
In the advanced settings in the left pane highlight inbound rules.
Right click inbound and click new rules
Add the port you need to add or allow access to. click next
Add TCP or UDP Protocol and also the port number in the next screen.
Allow the connection. Click Next
Do not forget to name the rule. Say ‘Minecraft server’ and click finish.
This is how you allow port forwarding and open firewall ports in Windows 10.
How to setup a Minecraft Server with hosting provider
Many of you might not be up for local host, primarily because it kills your CPU due to over usage.
Linux VPS hosting from Go4hosting is a lightweight, cheap and robust option, regardless of how many players you are expecting on your server. if you are God-gamer, dedicated servers will offer a better option.
Before you start –
You need to connect SSH with your hosting.
Step 1 – Install Java
Installing java to your server is not anywhere as easy as installing it on Windows 10. The below commands got you covered however.
| apt-cache search openjdk |
As root user with the SSH, enter the above command.
You are now displayed with the available OpenJDK package to install Java. We are going to work with OpenJDK 7.
Enter the following commands, one by one.
| apt-get update |
Now install the software package you have selected
| apt-get install openjdk-7-jdk |
You are now shown the version that was just installed.
Step 2 – Creating location to store Minecraft server files
You would not want your files to lie here and there, but in a particular location.
To do so, create a directory and tem change Minecraft storage to that particular directory.
| mkdir minecraftcd minecraft |
The above two command will help you get the job done.
Step 3 – Download Minecraft Server files
wget command downloads files to a directory and here also we are going to make use of it to download required Minecraft files.
| wget -O minecraft_server.jar https://launcher.mojang.com/v1/objects/bb2b6b1aefcd70dfd1892149ac3a215f6c636b07/server.jar |
Run the above command, note the two lines are separated by a SINGLE SPACE and are not two different command lines.
Your server can continue to run even when you are not connected. This will ensure your Minecraft character is at work, building things even if you are not actually in the game.
| yum install screenscreen |
Step 4 – Start the server
We are going to allocate 1GB RAM for Minecraft to run. You can allocate any memory (lesser or higher) by making the subsequent changes in the command letters marked bold.
| java –Xmx1G –Xms1G -jar minecraft_server.jar nogui |
We recommend you to stop the server once and restart it to make sure things are working smoothly. But before your restart, stop your server and tweak the below settings.
Edit file “server.properties” and set the code in it.
| enable-query=true |
Save the properties file. Now, restart the server.
| Quick Tip – your server is good for nothing if it is not publicly accessible Enter your server IP address into Server Status Checker to see if it publically visible or not. |
Step 5 – Map a domain (if you want to)
A complicated IP makes it difficult for people to remember. Domain names, on the other hand, are easier to remember and can make your server a brand of its own.
Here’s how you can link domain with Minecraft server.
- Creating an A record
| TTL – automatic |
| Value – Minecraft server IP |
| Host – @ |
Use the following values for creating an A record
Having created an A record, you now need an SRV record to run server on custom port. By default the port number is 25565.
You can connect any bare domain with the Minecraft server.
Following are the values you need to use –
| Port – custom port |
| Target – your domain |
| Weight- 5 |
| TTL – Automatic |
| Protocol – _tcp |
| Service – minecraft |
| Priority – 0 |
Save all changes.
Takeaway
This wraps up our guide on How To Create a Minecraft Server.
We have more such tutorials and guides on our blog section. Do not forget them to explore them here. Go4hosting provides a range of service including Game servers. you can order a free demo to see how our services work.
Subscribe
0 Comments
AWS Standard Consulting Partner


Alibaba Cloud


Cyfuture Ltd.
The Cricket Barn
Tiverton
Exeter
EX16 8ND
Ph: 1-888-795-2770
E-mail: [email protected]